As I get older, sun protection has elevated in priority during the summer months for me. Not because I am afraid of aging, I’m actually loving getting older and watching my body morph into it’s more experienced shape. It’s more from liking direct sunlight less and less especially if I know I’m going to be doing extended outdoor things.
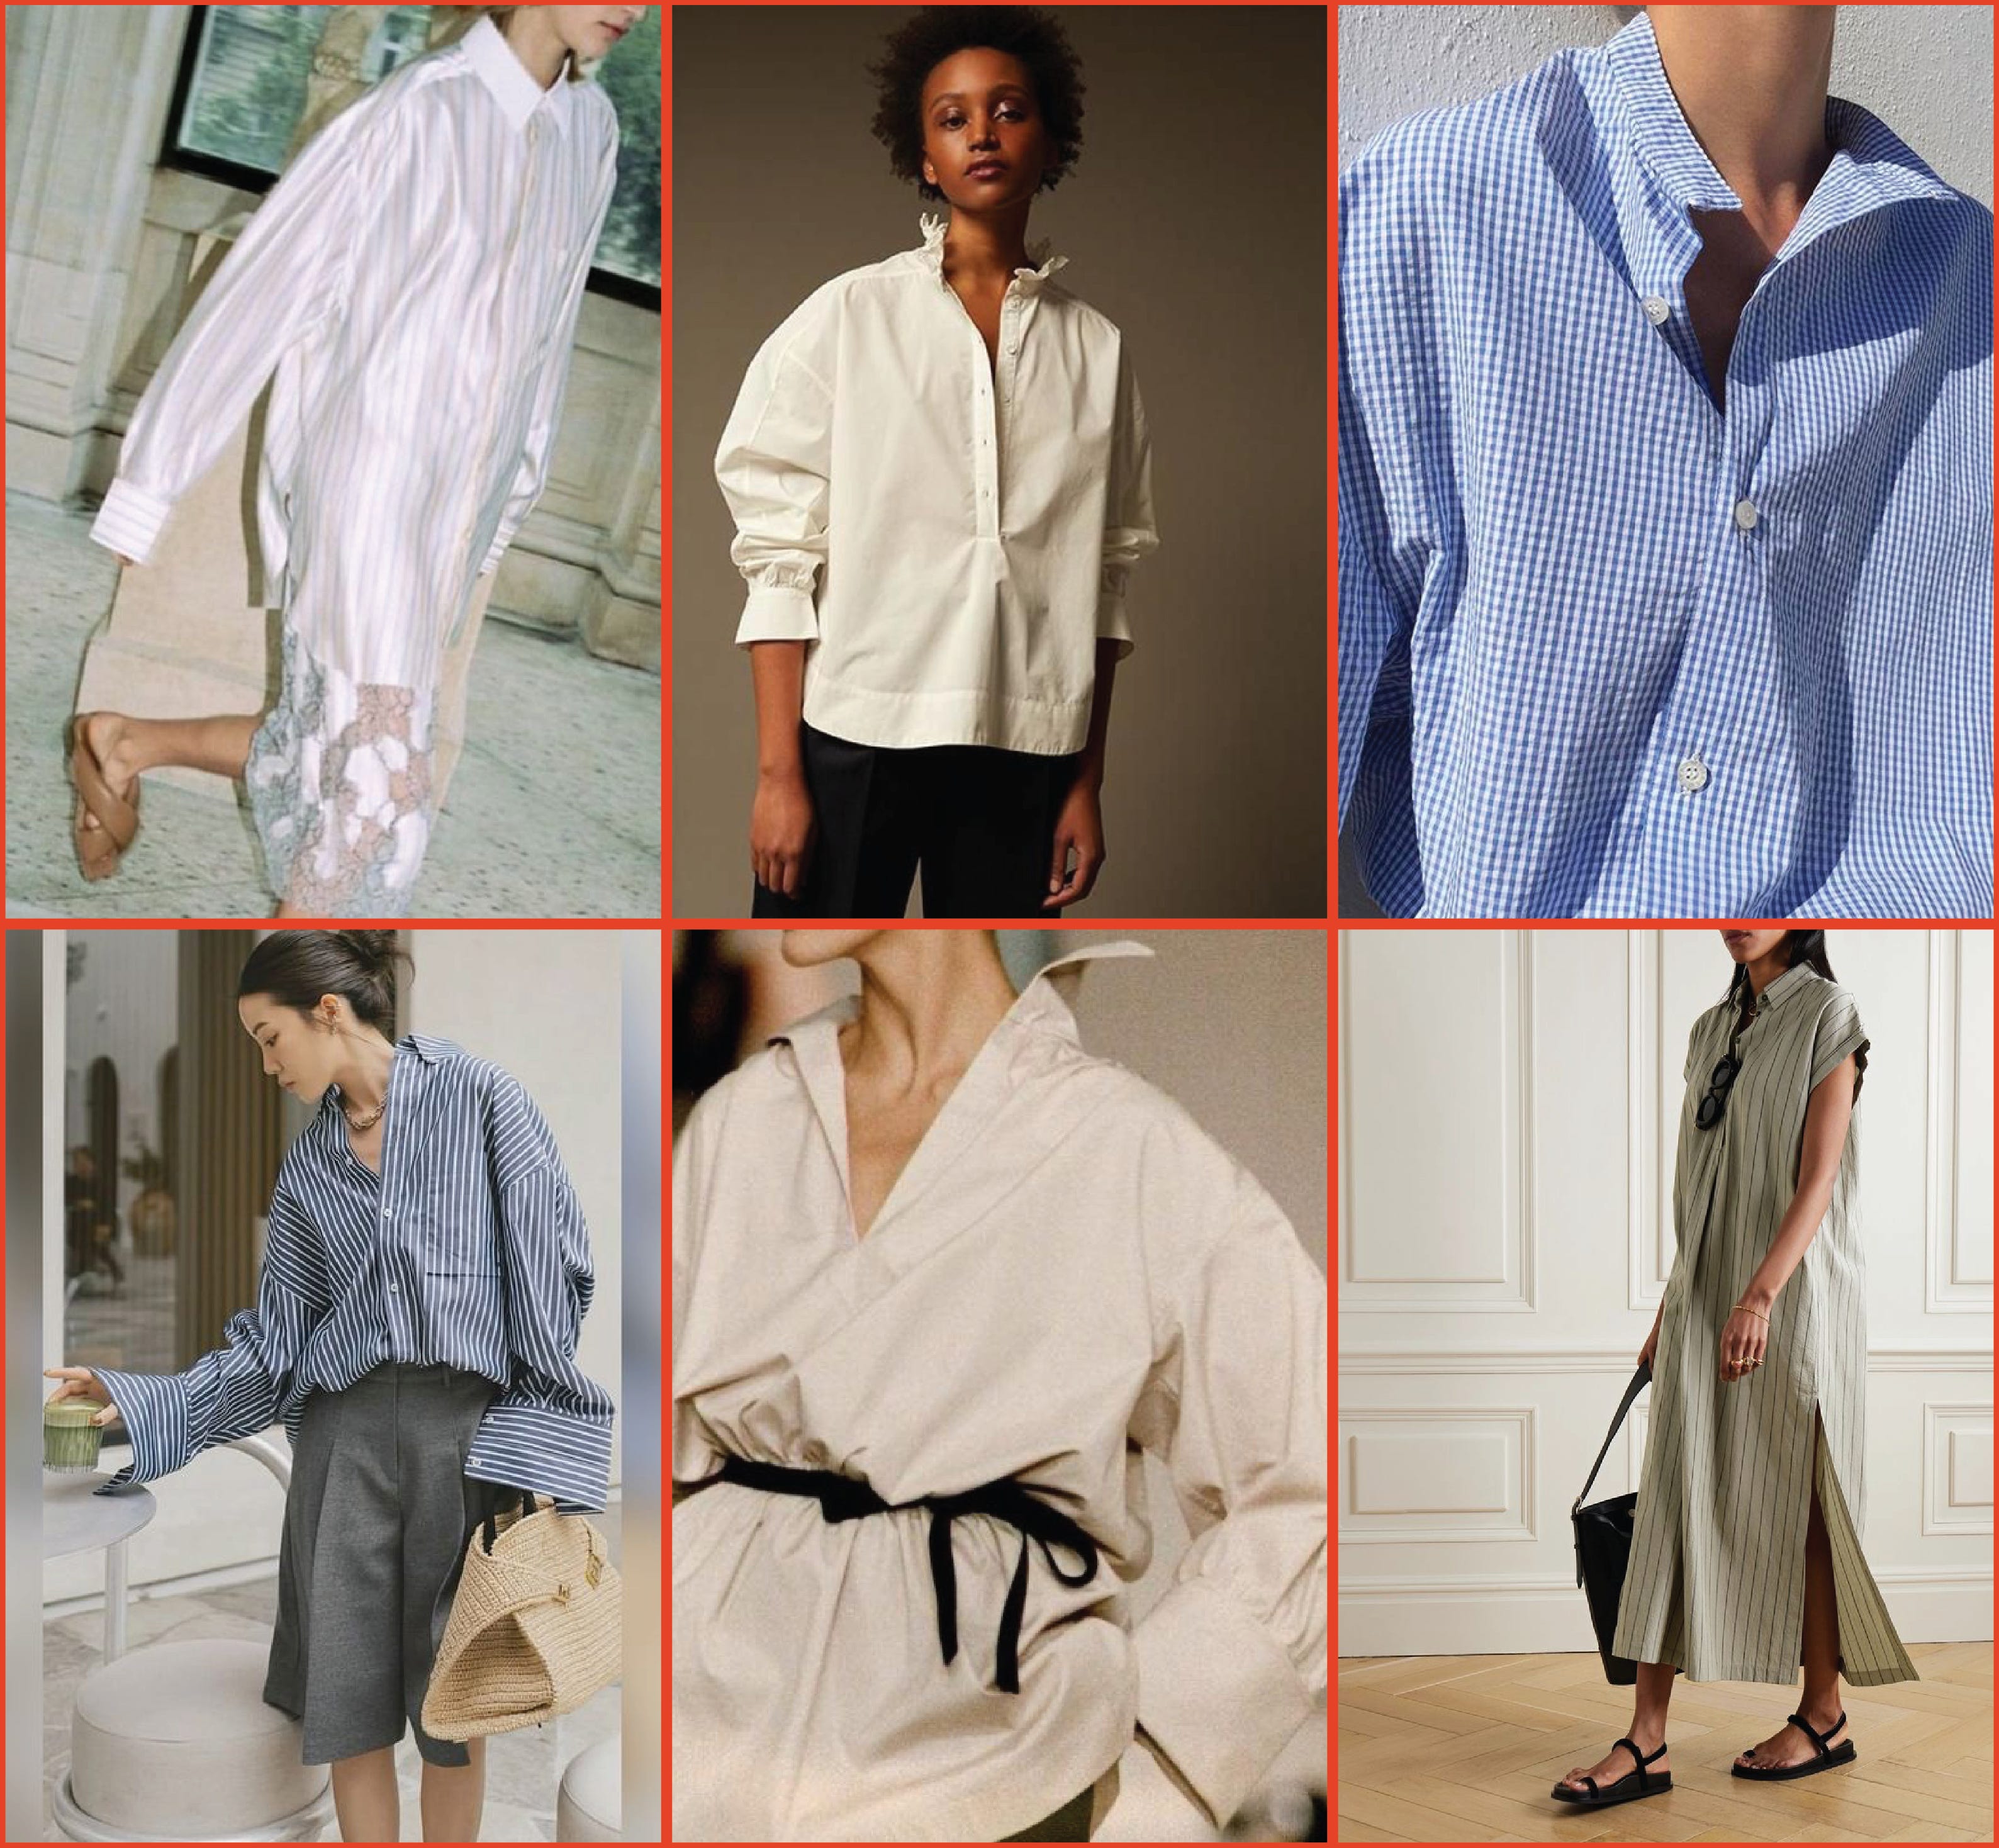
In still trying to figure out how to dress in the summer (I think though Allison Bornstein nailed the verbal queue of Desert Aunt here) I kept thinking about the obsession one of the designers at Apiece Apart has with smock style shirts, very Provençal. She would always talk about how she felt covered but still cool in the cotton fabric and also how versatile and classic and put together they made her feel (they of course loved adding lots of micro shirring and concentrated smocking).
And she’s right. These Mr.Darcy-esque style shirts are a welcome alternative to the beloved button-up. They tend to lean more vintage, more artiste and they most definitely keep you covered and cool.
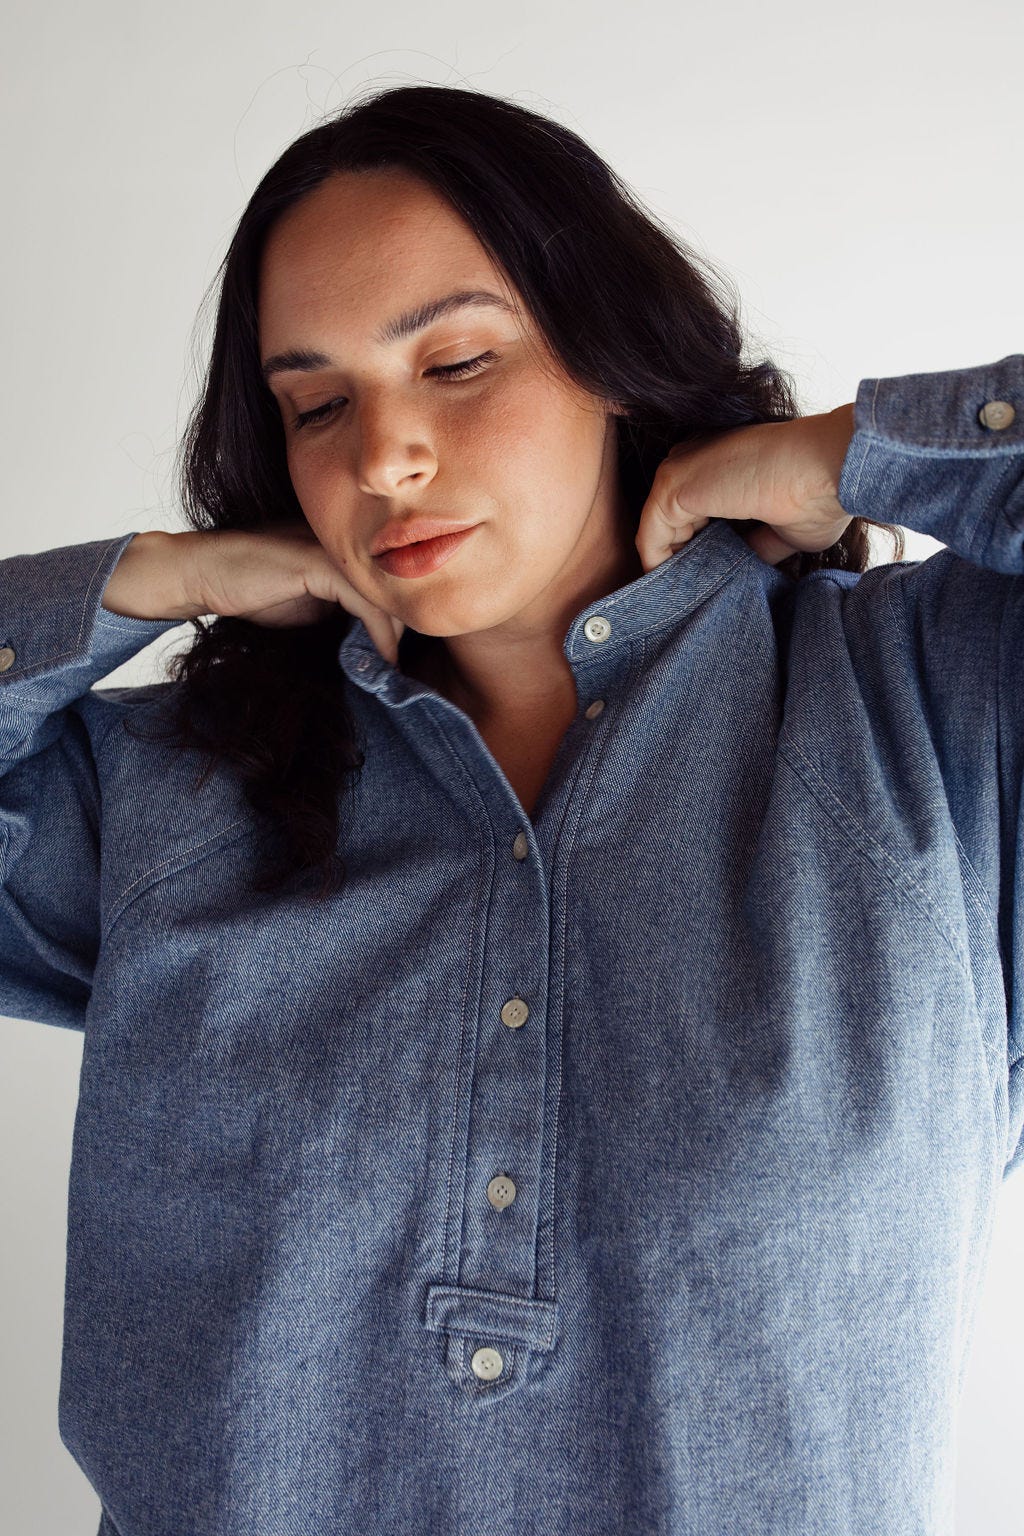
Welcome the Bonnet Shirt…
I’ve had plans for a shirt like this as kind of an homage to her since the beginning and have been squirreling away detail ideas. As usual it started with more details than necessary and was whittled down to four. Onto those details…
To not give you just any ol’ shirt placket I added a tab and bar detail that is purely aesthetic and totally optional. I do think however if you can nail the pressing and sewing it really elevates the shirt (see my tip for this below in the Ask Judy section). This is also a great place to play with contrast and sizing. Run a stripe horizontally, extend the tab 2”, use bold thread, embroider a flower instead of the button, etc.
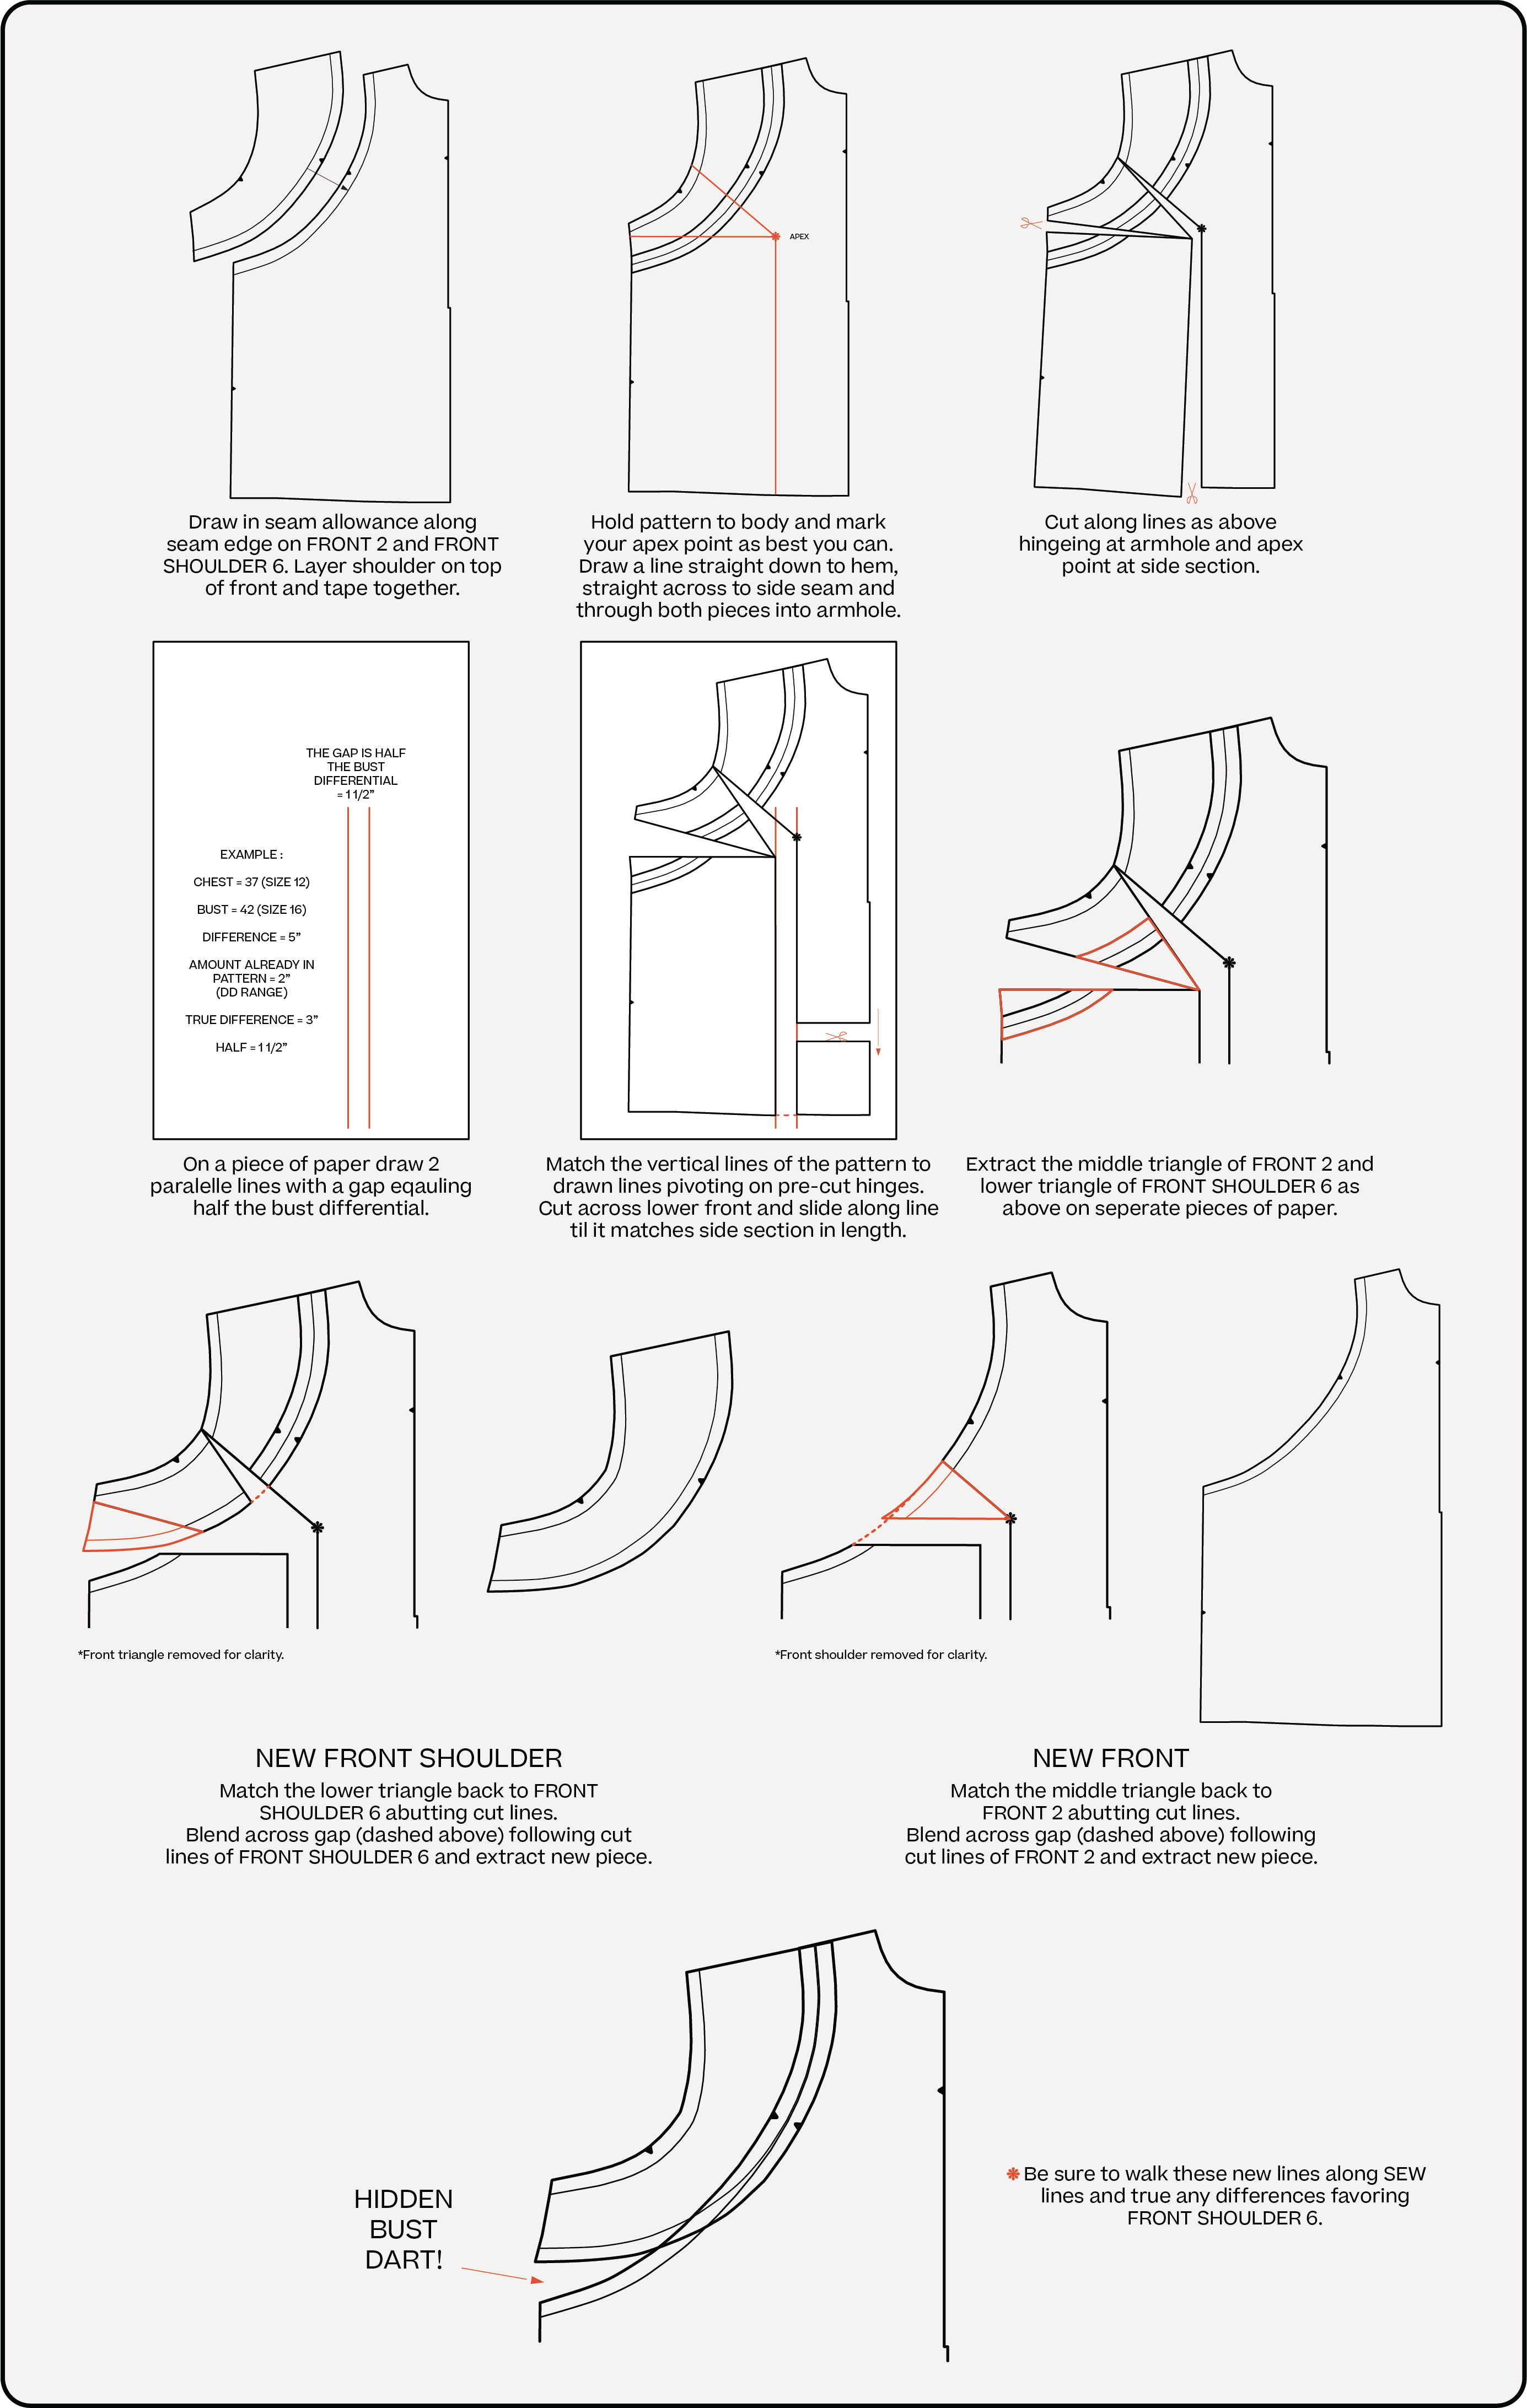
The shoulder areas at the front and back are pieced with the intention that the lines create the illusion that the shirt is more fitted while still being relaxed. I’ve seen the requests for more office appropriate shirts and I hope this trompe l’oeil, (wow the French theme is strong in this post) shallow shoulder silhouette will quench that thirst.
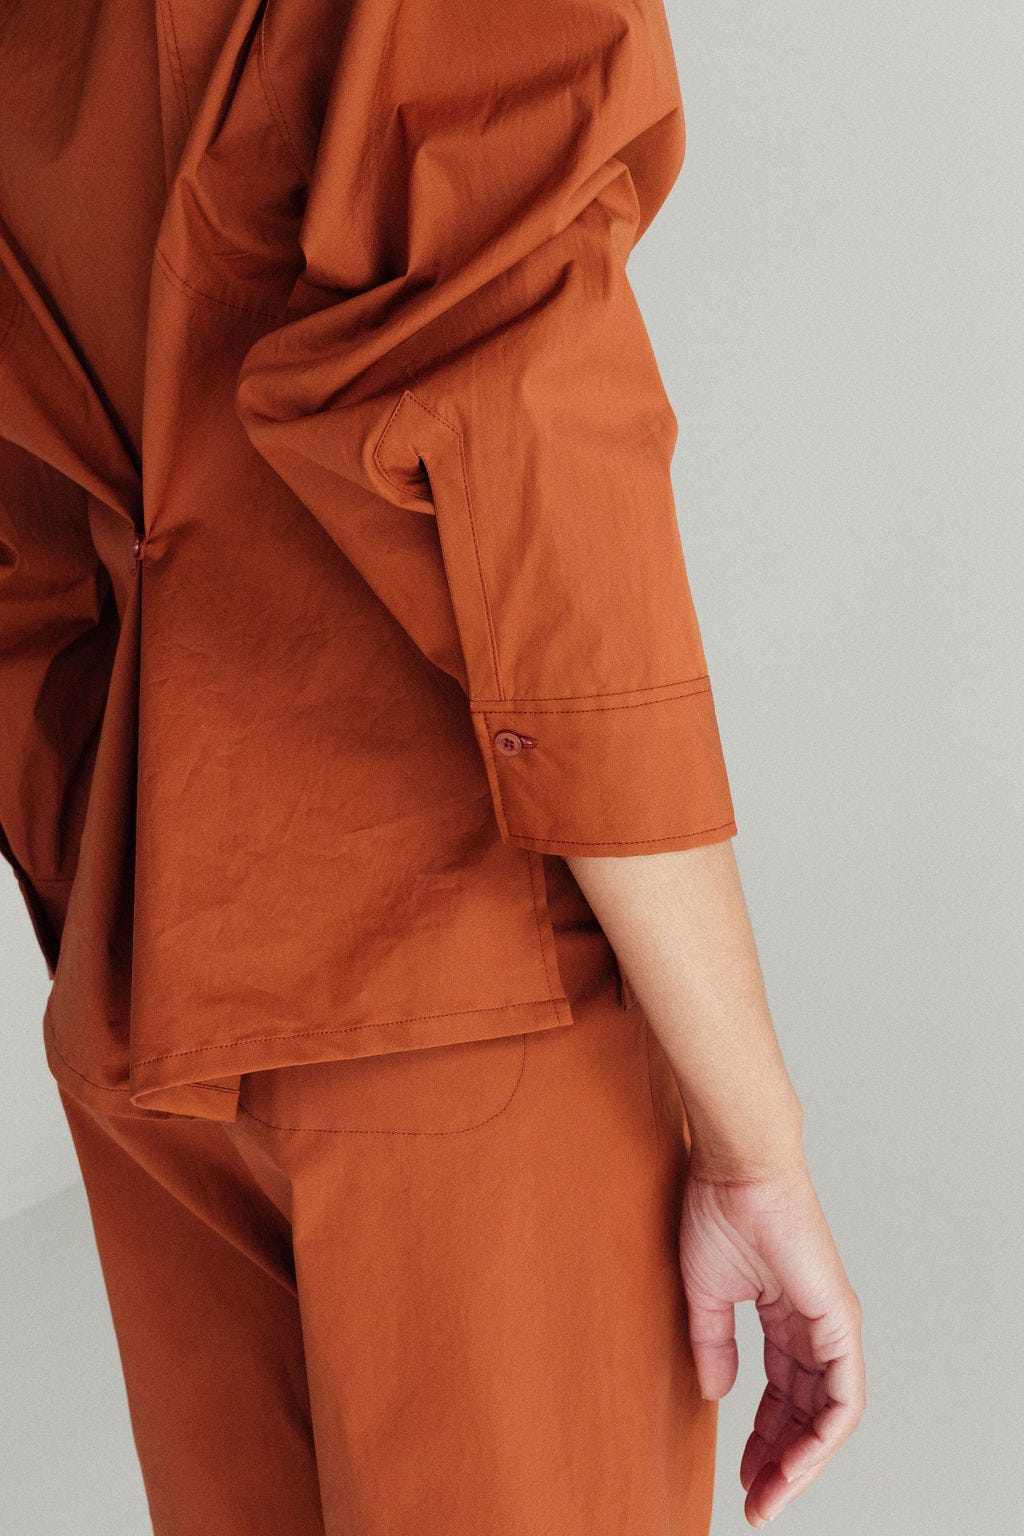
The cuffs however are my favorite part. They are built to be larger in circumference and have 2 buttons for adjustability. The first button is loose and breezy while the second button gives you this beautiful lantern-ish effect. I was trying to replicate a similar feeling as the Thompson Coat sleeve opening that people seem to really love.
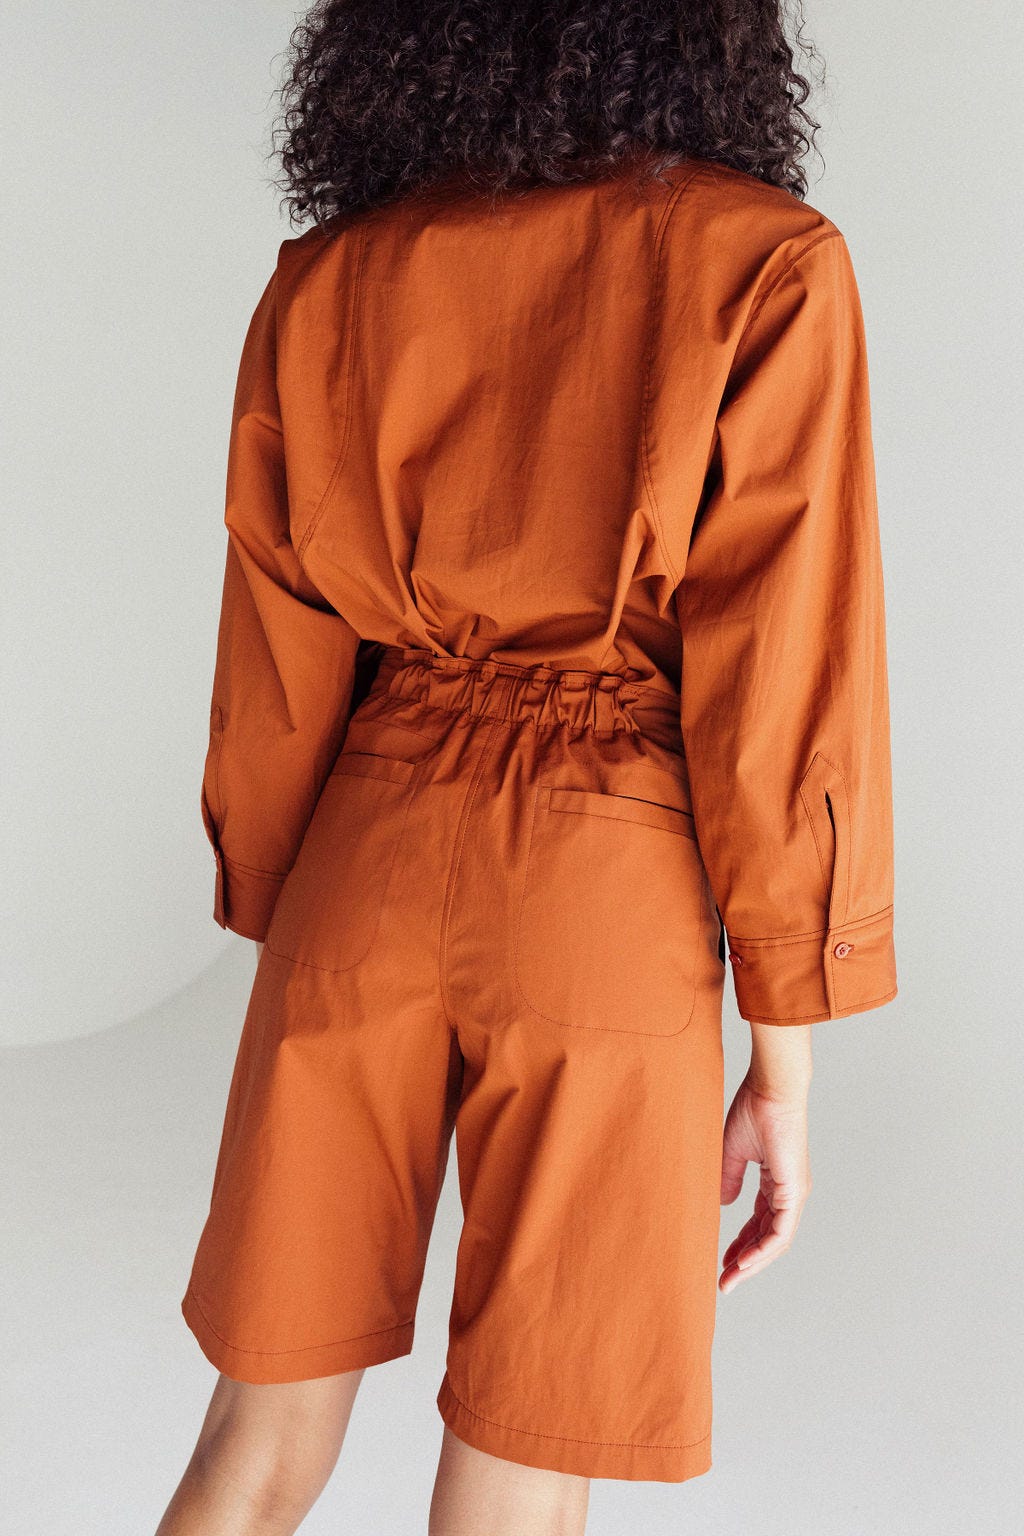
Besides the shirt view there are 2 other views, tunic and dress, and having the option to add shaping is always a win for me. I mulled over the right way to do this, because there are many of them, and landed on a button and loop system. This too is optional but is a nice to have in those moments when you want the style to sit closer to your body. (Also love the idea of a self belt like the YSL image below!)
Then there’s construction which I thought a lot about. Like a lot a lot after the testers finished and devoured a few shirt making books because we are always learning and evolving! I had a good grasp on the topic previously but can now say that a fascination has been created. Fine shirt making is an art form so take your time and slow down a bit.
I saw a video recently about how most of Gen Z hasn’t experienced high quality clothing because (and to no fault of their own) they have only known fast fashion. But even in home sewing we can rush to the try on moment and lose some of that quality we’re able to put into our hand made clothes.


Was this pattern named after Stede Bonnet? I had to ask!
Ha! No but Our Flag Means Death is hilarious (aware he was a real live person at some point). It named after Bonnet Shores, a neighborhood in Narragansett, RI I lived in when I was in college. We lived in peoples off season beach houses which now as an adult I can not believe is a thing.
Is it easy to combine the bodice + yoke to have a simple/single dropped shoulder seam?
Yes! This is purely an aesthetic seam so you can easily draw in the seam allowances on both pieces, match them up and join them together.
Would piping work in the shoulder panel or would it add too much stiffness? Could we fake it?
I think unfilled piping/flat piping would be great here and wouldn’t make these seams too stiff. It would also depend on your material choice so the lighter the fabric the more flexible! Giving extra clips in this area doesn’t hurt either.
Is the shoulder a drop shoulder?
I would call this a shallow drop shoulder, it’s not as dropped as the Genra Shirt. If you prefer a less dropped shoulder you can consider sizing down in that area but you’ll have to do some extra patten work with the sleeve to make sure it matches the sizing differences.
What are your thoughts on sizing down for a more fitted look?
Definitely doable but there are differences to consider. A garment that is built to be relaxed or oversized is patterned differently than garments that are meant to be fitted. The armholes are dropped more, the curvature of the armholes are shallower, the sleeve caps are shorter and the shoulders are wider. Sizing down won’t give you a fitted look it will give you an oversized silhouette that has less ease. So if that sounds fine to you go for it!
Is there a functional reason for the button at the very bottom of the placket?
Its purely aesthetic as the button is sewn through the tab and the body but you can add a button hole to the tab and only sew the button to the body for added detail.
Any tips on nailing the details in a lighter/drapier fabric?
A great way to get any tiny pieces super crisp is fusible webbing. In the instructions I give you the finished measurements for the bar and loop cover so you can cut a piece of fusible webbing (stitch witchery, steam a seam, etc.) and bond the seam allowances in place so they don’t shift in sewing. Another good thing to do is cut those same finished measurement pieces in a lightweight cardboard (like a cereal box) and use those as pressing guides. I’ll also use fusible webbing to fuse the pieces to the garment before stitching in place.
I’m thinking contrast on the shoulder/armscye detail-has anyone tried it?
Not yet but love the idea! I’ve been thinking about directional play there. Like using a stripe and flipping the grainline 90* for the front and back shoulders.
Any further pointers on body size versus finished garment size?
Something I guide a lot of people towards when picking sizing is looking in their existing wardrobe. If the ease difference feels too much from the numbers, try to find something you already own and measure it. You may find that you actually like that amount of ease or it’ll be a great guide to pick the right size for your preferred ease. I did the same thing recently with the waistband for a pair of pants. I had what I thought was the right number in my head but when I checked a sample I liked the fit of, it was a good 1 1/2” larger!
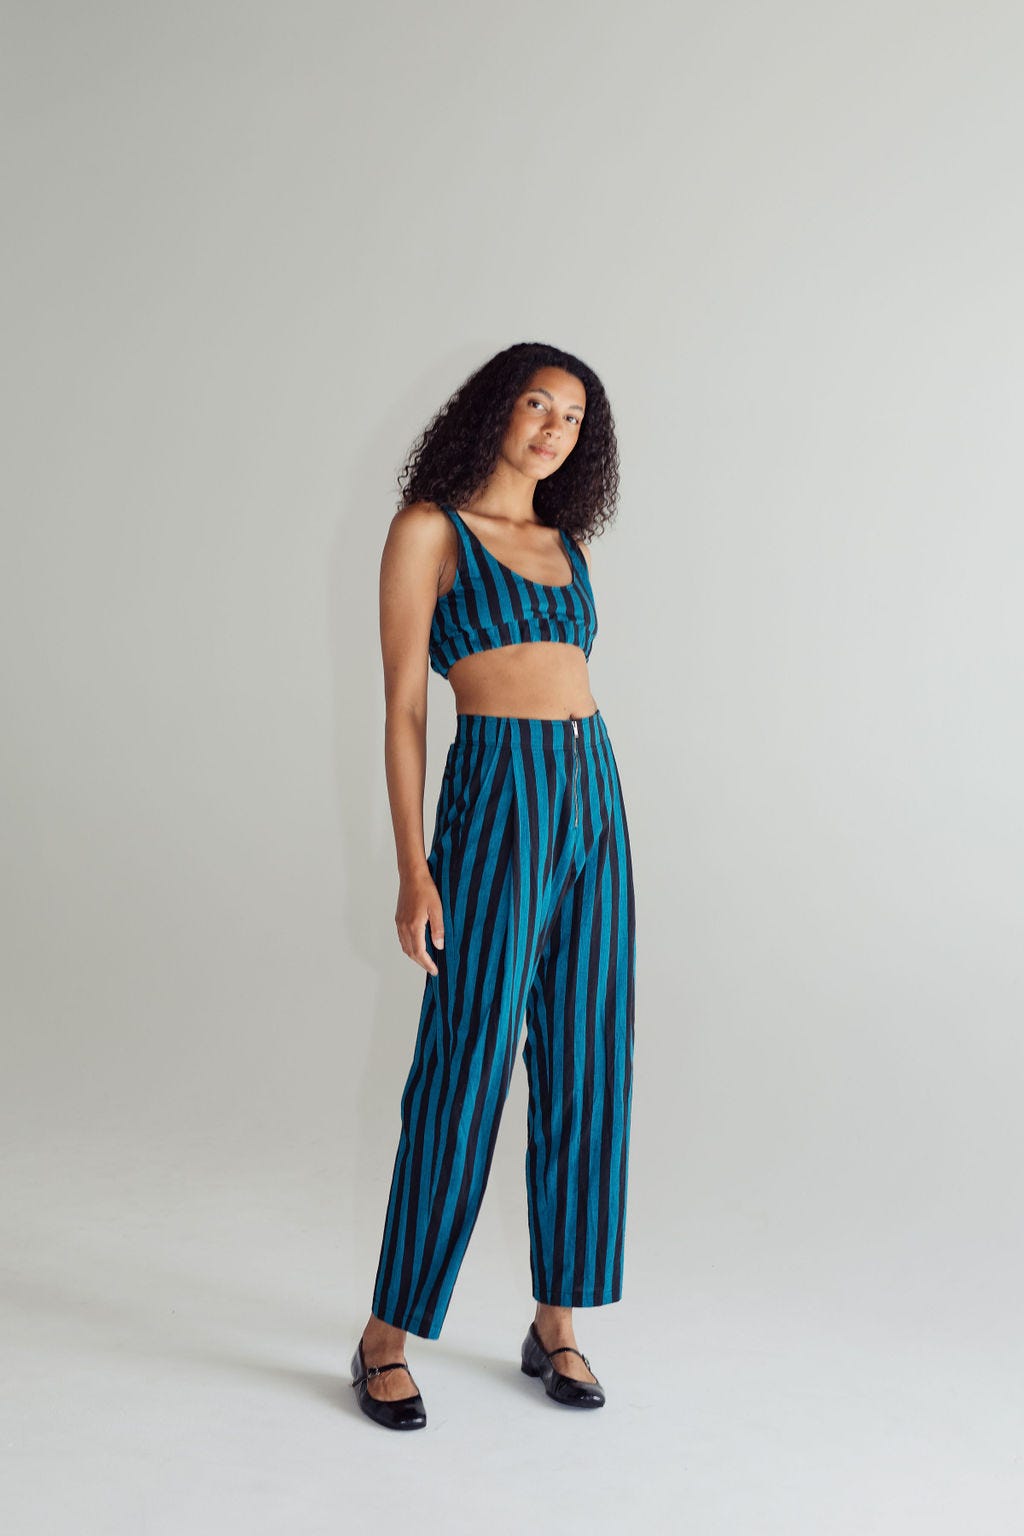
Styling inspo?
Coming at you 😎 til then check out the Pinterest board.
How would you add a bust dart?

-
I have been eyeing this Kiton shirting from Britex for a while
-
This hammered silk goodness. I’m predicting a return of paisley…
-
I have been loving using vintage enamel pins in place of buttons

Next Tuesday I’m talking all things shirting over on the Loose Leaf. A bit of history, what to look out for in buying fabric and why the word poplin should be treated like the word champagne. If it’s not champagne grapes it’s not champagne poplin.

Last but not least we have a tester call!! I’ve been teasing this style in other product photos and we’re getting closer and closer to it being in your hands. Come test the Monty Pant! It’s a zip front, pleat front pant with an elastic back that also comes in a shorts view.
8.18.24 - Sign Up Closed